
In the previous post, I shared how the engineering and construction of a large sun for the Hickory Sun Day quilt. In this post, I’ll share my technique and some tools for creating the graduated blue background for the quilt.
The background began with about 12 different blue batik and cotton print fabrics for the quilts background. The range began with a deep navy (almost black) then progressed to blues that were pale in comparison. The idea was to create a varied background that would provide contrast to needed to really highlight the sun.

It seemed like 2 1/2″ squares would do the trick. Even though I knew it would be a lot of sewing, I felt like 2 1/2″ was just small enough to create the effect without getting pieces so small that I would be sewing into the next millennium.
I began laying out squares on my floor, going from dark to light as the blues approached the sun. Sometimes, it wasn’t just the placement but also the right rotation of the square as it related to its neighbors that created better blending.
The entire field of blues was laid out before doing any sewing. As it turns out, this was a good idea, because even after laying out what I thought was needed, I discovered, the background wasn’t big enough for the outer rays of the sun! So I added I more tiny blue squares after another trip to the fabric store a stash raid for more blues. After days of placing and then moving the squares around, I finally had what looked like the right mix.
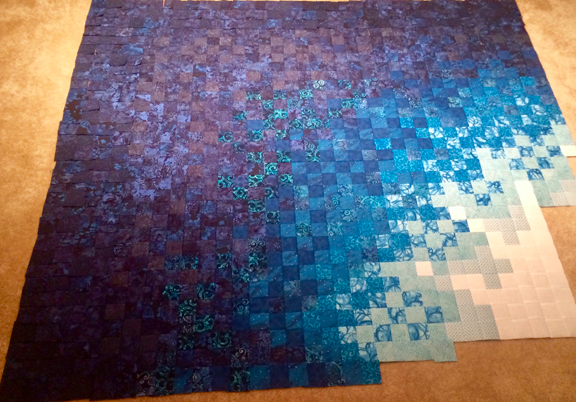
Beautiful!
But wait: that’s over 1100 small squares I have to sew together! And they need to stay in this order. Ugh! There’s got to be a better way.
So I asked Maureen, the owner of a local quilt shop (The Quiltery), if there was any technique or tool to speed up or simplify the construction of this number of blocks. She showed me 2 1/2″ grid fusible interfacing that could be used for this type of construction.
Quiltsmart offers pre-printed panels of fusible interfacing that allows you to first iron fabric swatches onto it, then stitch the pieces together in long rows rather than sewing 2 pieces together at a time. I purchased enough panels to handle the amount of fabric pieces I needed for the mosaic background.
Using a palm-sized iron and a pressing board (not an ironing board), I transferred the pieces to the fusible, being careful to keep the same layout and orientation. I laid in one row at a time, and ironed the entire row on carefully before starting the next row. It’s tricky not to iron onto the exposed interfacing!
I completed one panel at a time. Each panel was numbered and marked on the back for orientation and relation to it’s neighbor panel for easy assembly into the whole. When all the panels were completed, I sewed them together for the full blue mosaic background.
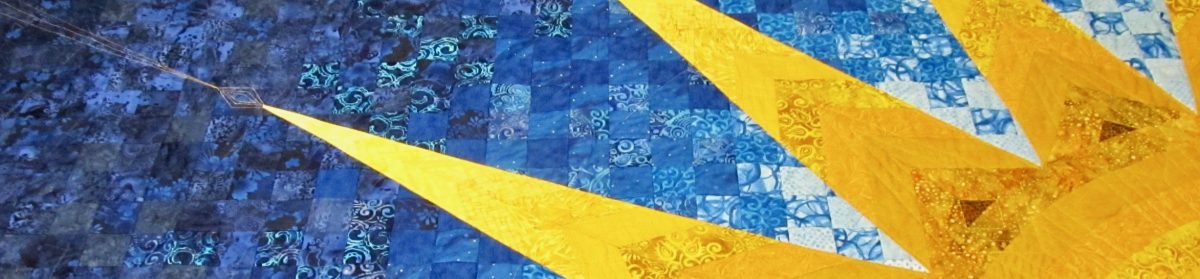
Now comes the fun part: combining the sun with the background. Find out how in the next post.

Leave a comment